Tuesday 1 May 2012

Evaluation


Once all the scenes had been completed and rendered, they were all put together using windows live movie maker. The background music was also added to the animation using windows live movie maker. The background music came from:

Shotgunguyy, 2010. Fallout 3 Music – Tension. [video online] Available at: <http://www.youtube.com/watch?v=PPSgv1sczKI> [Accessed 30 April 2012].

Overall I am quite pleased with the quality of my animation. With my work I have surprised myself by achieving a much higher standard than I originally believed I could when I initially started this module. But throughout this module it has been a steady learning curve. If I repeated this project there a number of things I would change, and there are a number of different techniques that I now know that I could use. For example if I had more time on this project I would add a lot more background scenery, for example models of trees swaying in the wind. Also I would have liked to have added more scenes to the animation making it a lot longer. Plus given more time to practise with 3ds max I would have liked to create and incorporate models of people within my animation. Finally I could also create and edit proper sound effects to go along with my animation, such as sound effects for the siege engine falling over and breaking in two.

Scene 5 creation


Scene five is the final scene of the animation. This scene was intended to be the climatic end to the battle where the siege engines finally reach the wall. This scene started with the basic stage that was used to create scenes 2, 3 and 4. Then I imported a model of the arrow and grouped it together. I then scaled up the arrow so it would look to scale next to the other models. Next I positioned the arrow in the air above the wall and rotated the arrow so it pointed downwards at an angle. Finally using arrays I copied the arrow a number of times.

Next I added the three models of the siege engines to the stage and grouped the bottom half and the top half of the siege engines. The siege engines were then individually animated moving up to the wall and then dropping their draw bridges. Then using key frames and auto key I animated the arrow firing downwards at the ground around the siege engines.

For the camera for this scene I used a target camera. I placed the camera and adjusted the stock lenses to fit all the siege engines and the background in the battle scene. This proved difficult to fit everything within the scene, without making everything look too small.

Once the camera was set up the lighting was added. A daylight system was added to the animation. The daylight system was angled with the direction and tilt to cast a realistic shadow for a scene set in the evening. This was consistent with all the other scenes. But with the daylight system I encountered a problem within this scene. The problem was that the arrows in the air were casting a shadow on the scene. After tweaking the positing of the daylight system I managed to overcome this problem. Once I was happy with the animation I created my finally uncompressed render of the scene in 1280 by 720. But after I had rendered the animation I notice that the wall slightly moved forwards. This meant that I needed to delete any key frames that I found for the wall and re-render my animation.

The images bellow show scene 4 of my animation:


Scene 4 creation

In order to create scene four, I used the same basic stage that was used to create scenes two and three. For this scene I only used one model of the siege engine and I grouped the whole model together, apart from the wheels that I kept separate. The wheels were kept separate in order to animate them spinning.

In order to animate the wheels spinning and the model moving, I selected all the wheels and the grouped siege engine and moved them together using auto key. Once the siege engine was moved forwards using auto key, I then focused on making the wheels spin. This was simply done by using auto key again and setting the frames to the end of the timeline. Next all I had to do was rotate the wheels a few times and then play the animation. After playing the animation I decided that the wheels needed to rotate a bit fast in order to look like they were keeping up with the animation and the movement of the siege engine. After playing back the animation a number of times and making alterations to the wheels spinning, I was happy that the wheels looked as if they were spinning at the correct speed.

Once I was happy with the animation of the wheels spinning, I then focused my attention on the camera. I started by drawing and positioning the line in which I wanted the camera to follow (parallel to the siege engine and the wheels spinning). Once I was happy with the positioning of the line, I drew the free camera and attached the line as its path constraint. I then played the animation through the view of the camera and decided I needed to make a number of changes to the animation. I started by adjusting the stock lens of the camera to get the correct view I wanted for the animation. I also rotated the camera a little to ensure the wheels were the main focal point of the scene.

The main problem I encountered with this scene was that the camera was initially a lot quicker that the siege engine. This meant that for a large portion of the animation the camera just pointed at the ground and not the wheels on the siege engine. After a lot of tweaking, I managed to get my siege engine and the camera both moving at the speeds I wanted them too. This then made the scene seem as if the siege engine was having a close race with the camera and in the process, showing that all the wheels were spinning on the siege engine and showing off the detail of the model.

Once the camera was set up the lighting was added. A daylight system was added to the animation. The daylight system was angled with the direction and tilt to cast a realistic shadow for a scene set in the evening. This was consistent with all the other scenes. Once I was happy with the animation I created my finally uncompressed render of the scene in 1280 by 720. But after I had rendered the animation I notice that there was nothing in the background of the image. In order to solve this problem I raised the grass in the far background. This then made the animation shows just grass in the background instead of nothing.

The images bellow show scene 4 of my animation:


Scene 3 creation

Scene three was one of my most complicated scenes. This scene animates one of the siege engines falling over and breaking apart. In order to create this scene I started with scene two and then edited the scene. I started by removing all but one of the models of the siege engines. Then I altered the grouping of the siege engine, making the top half and the bottom half group separately. This was to allow the siege engine to break in two when it falls over. Then I animated the siege engine moving forwards. This was done by selecting both the top and bottom segments and moving and rotating them together. The top half would then need slight alterations in order to keep it in the correct place in perspective with the bottom half of the siege engine.

I then frame by frame animated how I visualised the siege engine falling apart. This was a very time consuming process. This was because it was very hard to make the siege engine breaking apart look natural. One of the main problems was that certain stages of the siege engine breaking apart played too quick, and others played too slow. This meant that I had to move certain key frames, making each animation segment shorter or longer.

The next stage of the animation was to create the camera for the scene and delete the old camera that was still there from scene two. To start with I drew the line that I wanted the camera to follow, and moved and rotated it into place. Then I created a free camera and attached it on the line that had just been drawn. This was done using a path constraint. Once the camera had then been set up, with the correct stock lenses and pointed in the correct direction, I noticed that the background image was not large enough for the scene. This meant that the background image needed to be scaled up so it was taller. This did not cause too many problems with the quality of the image because I only wanted to show the sky in the background (which is predominantly blue, meaning I would not be distorting the shape of anything visible in the image).

Once the camera was set up the lighting was added. A daylight system was added to the animation. The daylight system was angled with the direction and tilt to cast a realistic shadow for a scene set in the evening. This was consistent with all the other scenes. Once the lighting was addend I watch the animation numerous times. I then made a number of slight tweaks to the animation to make the scene look more natural and fluent. This included alterations to how the siege engine broke apart and the speed in which the camera moved (in order to keep up with the siege engine falling). The final stage was to render the scene, play the animation and then edit the animation with a few tweaks to make the animation seem more realistic. Once I was happy with the animation I created my finally uncompressed render of the scene in 1280 by 720.

The images bellow show scene 3 of my animation:


Scene 2 creation

For scene two I used the generic stage that I created for all my animation scenes. When using this stage all I had to do was firstly place my models in the correct starting points. Once the models were in place I could begin animating them. When the models start to move over the hill, they did not need to follow the terrain of the hill exactly. This was because this part of the animation was not in view, due to the camera angle. But once the models reach the brow of the hill, they needed to follow and reactant to the terrain exactly. This meant that I had to move and rotate the models individually every few frames. I found this very difficult at first. This is because it was hard to make the models follow the incline of the slope and react to any bumps and dips.

Once the animation was completed the camera angles and lighting needed to be added. A daylight system was added to the animation. The daylight system was angled with the direction and tilt to cast a realistic shadow for a scene set in the evening. This was consistent with all the other scenes. For the camera angle, I placed a stationary camera pointed at the brow of the hill. For this camera I choose a stock lenses that could fit all of the siege engines and the background in the scene, but while not being too zoomed out, so that the siege engines appear tiny.

The images bellow show scene 2 of my animation:


Scene 1 creation

As the image below shows, scene 1 was created by using a plane with a grass texture applied. The plane was edited using soft selection in order to create a hill in the background and then two more instances of the plan were created and rotated to create the surrounding hills. Then to create the sky in the background, a large sphere was created with a suitable colour of blue being applied. Then force 2-sided was check in the rendering setting. This was so the colour would also appear inside the sphere instead of just outside the sphere.

Next the model of the siege engine was imported and place in the middle of the scene. A circle was then drawn around the siege engine. Then a target camera was placed in the scene with the focus being on the siege engine. Next I used path constraint to make the camera follow the circle. The camera would then pan around the siege engine. But initially the camera panned around too fast, so I increased the number of frames for the scene to 500.

Finally I added lighting to the animation. Because my animation is based outside, there would be no spotlights or any other types of lighting within my scene. This then meant that the only form of lighting that I used in all my animation scenes was a day light system. With the daylight system I angled the direction and tilt to cast a realistic shadow for a scene set in the evening.

Sunday 29 April 2012

Update on progress of the animation


During the early stages of the creation of the animation I have encountered a number of issues that I have had to overcome. Initially moving the siege engines up and over the hill has proven more difficult than I originally thought. Also finding the correct camera angle has also proven difficult to create a good scene. I am also now considering adding a scene that is a close up of the wheels on the siege engine in order to convince the audience that the wheels are spinning.
Finally I have decided to split the animation up into a number of scenes to be rendered separately. These separate scenes will then be added together using windows live movie maker, with some added background music to set the scene.

Tuesday 17 April 2012

Creating the scene for the animation

Once all the models were fully completed, the scene of the battlefield needed to be created. The first image below shows a plane that has been edited using soft selection to create the hill and to add the bumps and dips in the ground to make the scene look more realistic. The plane then had a grass texture placed over that had to be scaled down into small tiles so that the blades of grass weren’t too big. The background was then created using a simple box with an image of a field being used as the texture. Finally three of the wall models were place together to create the walled structure that the siege engines would be attacking.


The next image below shows the siege engine being added to the scene. The siege engine then needed to be placed on the floor, so it looked natural on top of the grass (not hovering over it or halfway through the ground). Also the siege engine had to be scaled down so it was the correct size in proportion to the wall.


Finally using an array the siege engine was copied three times.


 The finally image below shows the view that one of the cameras would be using.


Texture references:

The Grass
j-m-s, n.d. Grass is Grass. [image online] Available at: <http://designresourcebox.com/grass-is-grass/> [Accessed 17 April 2012].

The Background image
buxton field centre, n.d. From the Field Centre looking towards the paddock. [image online] Available at: <http://www.buxtonfieldcentre.co.uk/> [Accessed 17 April 2012].

Monday 16 April 2012

Making the siege engines bridge upright

Before the animation could be started all the pieces needed to be organised and put in place. Firstly the image below shows the siege engine with its top half in the upright position. The original model of the siege engine had the bridge down (this would have been fine for the end of the animation but the bridge has to be upright to deploy on the wall later). In order to pivot the bridge I grouped the top half of the animation together and then the bottom half of the animation together. Then I moved the pivot point for the bridge to the correct position and then rotated the top half of the model. After a bit of tweaking to the position of the top half, the bridge was in the correct position and was ready to use in the animation.


Updated Storyboard

The image below shows an updated and more detailed version of the animations storyboard. This new storyboard adds terrain and isn’t focused around one siege engine, but rather a battlefield with a number of siege engines attacking a wall. The terrain for this animation involves a downwards slope with the wall at the bottom of the hill. The animation will show the siege engine roll up to the brow of the hill with the camera then panning outwards to reveal the entire battlefield. The siege engines will then make their approach towards the wall with one or two siege engines being destroyed along the way. The animation will also have a large number of arrows being fired at the siege engines. The animation will then end with the siege engines then deploying on the wall.


Tuesday 20 March 2012

Reactors

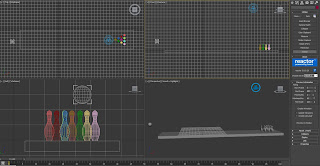
The images below show my first use of reactors. The images show the animation of a bowling ball knocking over some pins using reactors to simulate the collision and the effects of gravity. This was done by importing the objects and then adding them to the rigid body collection. Then I gave the pins a mass of 10 and the bowling ball a mass of 20. I also changed the collision tolerance to 0.2 and the start frame to 3. Then using auto key I moved the ball forwards and added spin up to frame 5 to give the ball momentum and spin. Then I previewed the animation in the window and made tweaks to the animation to make it seem real and so the ball knocked down all the pins.


Tuesday 13 March 2012

Expressions

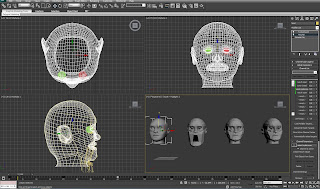
The image below shows the animation of different facial expressions. In order to create this animation I started by importing the head object and then creating three extra copies of the head. Then using poly editing I selected certain parts of the mouth and used the grow function to select the entire jaw. Then I moved the mouth to the desired expression. I then repeated this for the other two faces to create the expression of closed eyes and raised eyebrows. Next I used the morph function and selected the three different faces from the scene. Then using these different expressions I used the auto key function to create a short animation of a combination of facial expressions.

Thursday 1 March 2012

Tank mood board


References:

Leonardo da Vinci, n.d. italyconnoisseurs.com. [image online] Available at: <http://www.italyconnoisseurs.ru/eventi/wp-content/immagini/leonardo_davinci.jpg> [Accessed 15 February 2012].

thetoyzone.com, 2009. thetoyzone.com. [image online] Available at: <http://www.thetoyzone.com/wp-content/uploads/2009/07/davincitank_thumb1.jpg> [Accessed 15 February 2012].

Kaimai school, n.d. kaimai school. [image online] Available at: <http://www.kaimai.school.nz/leonardo/images/tank_image.jpg> [Accessed 15 February 2012].
John Farrier, 2009. 15 War Machines by Leonardo Da Vinci. [image online] Available at: <http://www.neatorama.com/2009/08/03/15-war-machines-by-leonardo-da-vinci/> [Accessed 1 March 2012].

Patrick Wright, 2011. Tank: Life and Times of a 'Wonder Weapon'. [image online] Available at: <http://www.bbc.co.uk/history/worldwars/wwone/gallery_tank_01.shtml> [Accessed 1 March 2012].
Leonardo da Vinci, n.d. Da Vinci Invention Tank!. [image online] Available at: <http://www.leonardo-da-vinci-biography.com/da-vinci-invention-tank.html> [Accessed 1 March 2012].

flickr, n.d. Da Vinci - The Tank 2. [image online] Available at: <http://www.flickr.com/photos/ovidiu_tudor/3311516950/in/photostream> [Accessed 1 March 2012].

flickr, n.d. Da Vinci - The Tank. [image online] Available at: <http://www.flickr.com/photos/ovidiu_tudor/3311515030/in/photostream> [Accessed 1 March 2012].

Demitrius Berkley-Thomas, 2010. Assassin’s Creed Brotherhood – Review (Xbox 360). [image online] Available at: <http://www.gametactics.com/2010/12/assassins-creed-brotherhood-review-xbox-360/> [Accessed 1 March 2012].

Siege engine mood board


References:

Leonardo da Vinci, 1480. Machine for Storming Walls. [image online] Available at: <http://inventors.about.com/od/dstartinventors/ig/Inventions-of-Leonardo-DaVinci/Machine-for-Storming-Walls.htm> [Accessed 18 February 2012].

Gift of the Goddess, 2009. Da Vinci Siege Tower. [image online] Available at: <http://gift-of-the-goddess.deviantart.com/art/Da-Vinci-Siege-Tower-136613577> [Accessed 1 March 2012].

TheJimReaper, 2010. 3D Model Leonardo Da Vinci Siege Ladder. [image online] Available at: <http://www.the3dstudio.com/product_details.aspx?id_product=229573> [Accessed 1 March 2012].

Mar.k, 2009. Siege Machine. [image online] Available at: <http://www.the3dstudio.com/product_details.aspx?id_product=229573> [Accessed 1 March 2012].

sharetv.org, 2009. Doing Da Vinci. [image online] Available at: <http://sharetv.org/shows/doing_da_vinci/episodes/473349> [Accessed 2 March 2012].

Rendered images of my three models


The image below sows the base with the weighted concrete balls on the back. In order to create the box that contains the concrete balls, I first had to create a simple box and convert it to an editable poly. Next I created a segment in the middle of the box. This segment was a slightly smaller square in the centre of the box. I then used the polygon tool to extrude the segment downwards to create the box. Then I created a basic sphere and copied it a number of times to fill the top layer of the box.


Then to complete the base of the model a base was added. In order to get the base to fit the shape of the model correctly, a box was used with a number of lengthways segments that had been added. Then using poly modelling the box was moulded to fit the base of the siege engine. Also the pole that would have been used by the animals to pull the siege engine was added using two boxes and a cylinder.


After the base had been completed I started to build the model of the siege engine upwards. The first thing that was built up was the stairs. This was because the stairs can be the hardest thing to get the correct height, so they still look natural and not too steep. Then to make the stairs look more authentic two beams were added either side.

Then once the stairs were in place I continued to build the frame up using copies of basic boxes that were scaled up or down and rotated into place.


Once the frame had been created I could then create the bride that would drop down onto the wall. The bridge was created by using a simple box as the base and then was copied and rotated for the sides. Then a pyramid was added for the end. Finally the bridge was placed in the correct place and scaled down to fit the size of the model.
Next the counter weights and string was added. In order to create the counter weights I used a number of boxes and then to create the curved edge I used soft selection and curved the edge in. To create the sting a cylinder was used. Next tori were used to make the effect that the string was wrapped round the poll and for the hook that the string was tied to.
Finally the textures were added. Various UVW map settings had to be applied to the texture to fit correctly onto the model and so that the planks of wood move in the correct direction. The string used a plane white texture and the hooks for the string used the architecture and design copper texture. The wood texture was found at:
Like a texture, n.d. Wooden Plank. [image online] Available at: <http://fc08.deviantart.net/fs70/f/2010/265/9/2/wooden_plank_by_like_a_texture-d2z9iqu.jpg> [Accessed 1 March 2012].

The image below shows the completed model of da Vinci’s siege engine.


Tuesday 28 February 2012

Cameras

The image below shows my fist use of cameras. To create this animation I started by creating a set of random shapes. Then I used the spline tool to draw a line for the path that the camera would follow around the objects. Then I created a free form camera and then added the line as the path constraint for the camera. Then the camera had to be pointed in the correct direction and then the lenses had to be selected. Then under the path options under the motion tab, I selected the follow option and the bank option to make the camera move along the line that had been drawn earlier. From this I have learnt how to use cameras to create an effective animation. These skills can be applied to my final animation.

First animation


The image above shows my first attempt at animating with 3ds max. For this animation I started by creating a sphere and then using the auto key and set key with the timeline, I made the ball move up and down. Then using the track curve editor, I changed the change the movement speeds of the balls making it more closely resemble a bouncing ball. Then I made the animation loop and copied the ball two more times. Using the dope sheet the balls were then made to bounce at different times and different speeds.

From creating this animation I have learnt a number of skills and features within 3ds max. I have learnt how to properly use the timeline and set key frames automatically and manually. Also I have learnt how to increase and decrease the length of the timeline. Also I have learnt how to use the basics of the curve and dope sheet. All of these skills can be applied to my final project.